
We moved to Sacramento in August because Mr.A had been accepted into physical therapy school. I had, at the time, been accepted into a dental hygiene program, and I thought that's what I would be doing (long story short, I'm not going to school). After the move, we somehow ended up with a twin-sized white sheet that no one back at home wanted to claim as their own. So, it has been decided that this white sheet will become a new cover for the ugly green pillow.
To begin, here is what I hope to accomplish. Yes, I drew it. It's not that great, but you get the idea, right? If I feel very ambitious, I may try my hand at sewing some piping around the edges of the pillow. We'll see.

On the front are sewn a dozen or so "yo-yo's." These seem to have become popular and there are lots of "how-to's" out there on the internet. They're not easy to describe, so maybe this will help.
I'll start with a quickie explanation of how I made my yo-yo's. As with most sewing projects, you'll need some fabric, a pattern, needle, scissors, and thread. These are sewn by hand, so get ready for some time spent half-watching a movie with your significant other while you make these little (or big) guys.
Your pattern is a simple circle. Of course, the larger your pattern, the larger the yo-yo will be when you're finished, but you'll find that your yo-yo will come out at about half the size of your original circle. I encourage you to experiment by making a variety of sizes to see which you like best. I don't actually cut out a pattern because I find it easier to trace mixing bowls, cereal bowls, and dessert plates of various sizes. This is exactly what i did. So get going! Trace some circles on the wrong side of your fabric and cut them out.

The next couple of steps are important. They will determine whether your yo-yo looks neat and pretty or sloppy and, well, ugly. With your fabric circle wrong side up, fold the edge over about 1/4 inch all the way around the circle. Although it is somewhat a pain, I pin as I go. I don't really see a way around it.

Next, we'll baste around the circumference of the circle. This one takes the top spot for most crucial step. Baste as close to the edge of the circle as you can. If you baste too far from the edge, you will most certainly have an ugly yo-yo on your hands. Wasted time and effort. Your fabric won't be wasted because you can remove your stitches and start over. But why learn the hard way when you can take my advice right now? See below: bad basting on the left. Good on the right. Also, be sure to use a double strand of thread. It needs to be able to withstand what lies ahead.

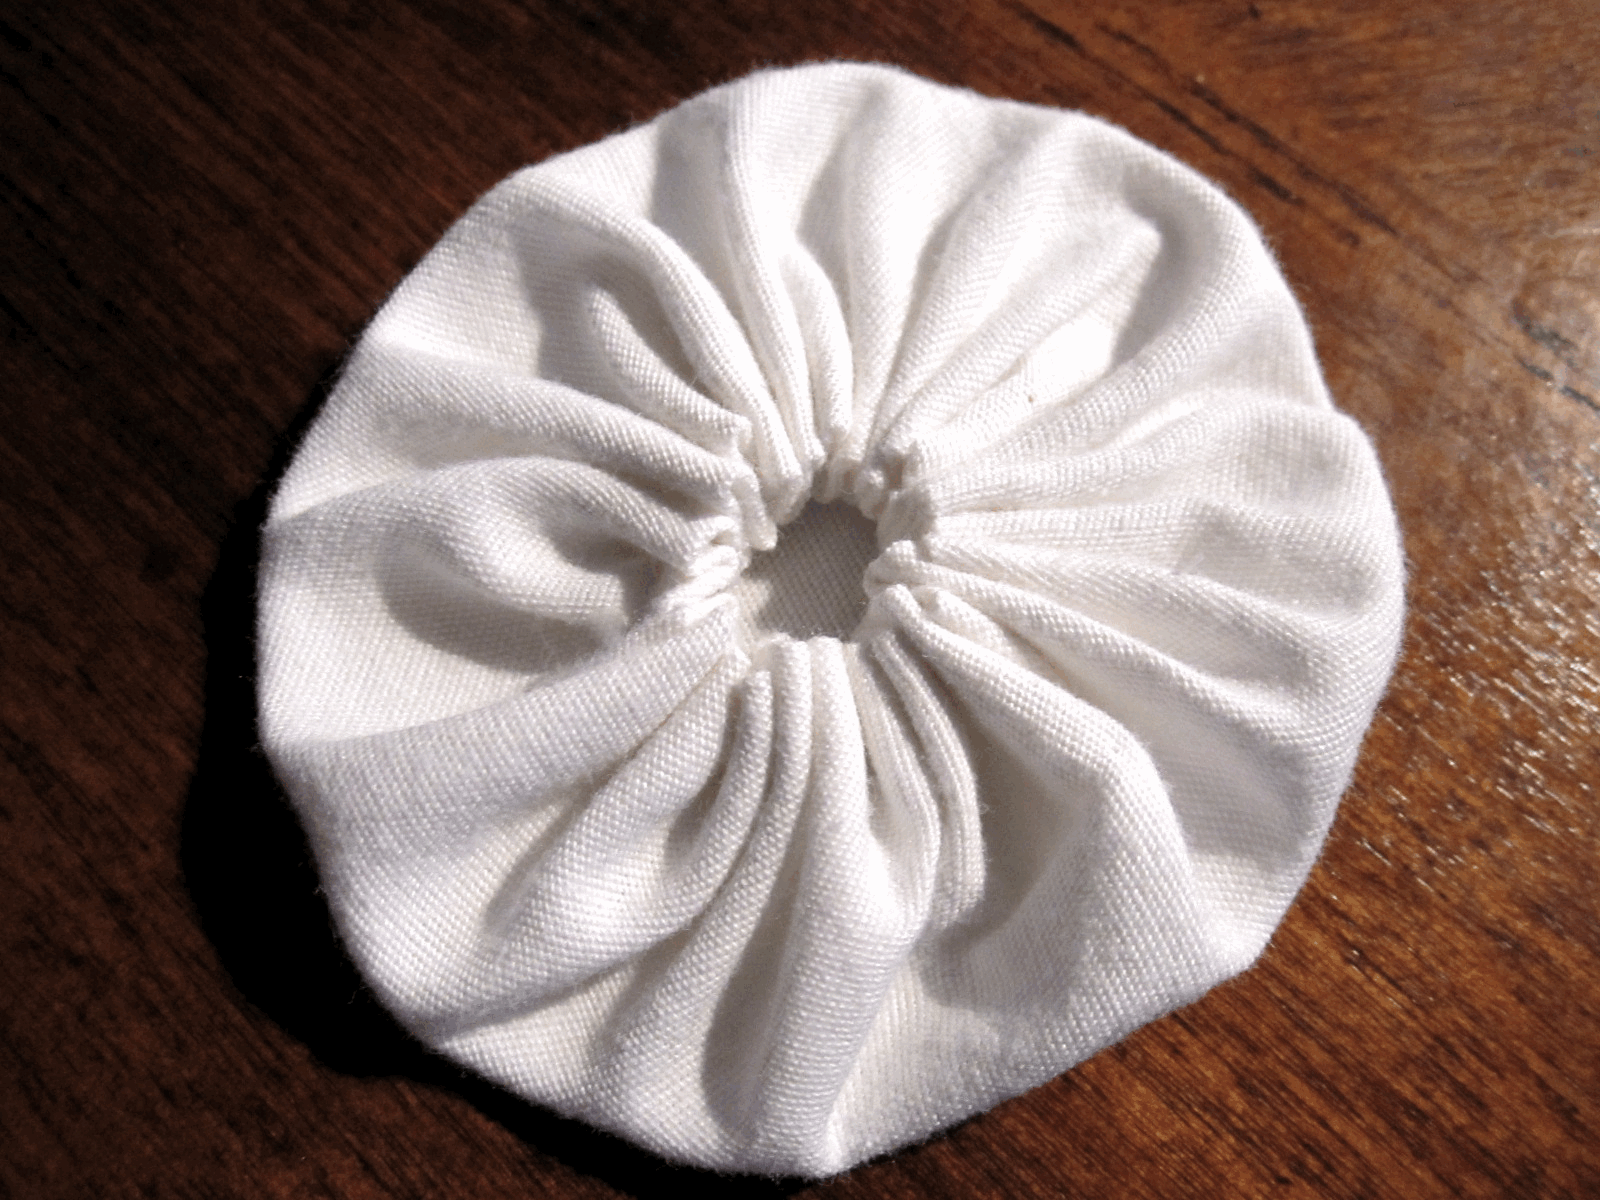
Now that you've made it all the way around the circle, don't tie off that thread! Carefully pull the thread taught until the edges of the circle come together, all puckered in the center of the circle. Be sure that your yo-yo takes form with the fabric right side out. If you've used a double strand of thread, it shouldn't break as you pull.
Your yo-yo should look like the one above. If you like what you see, you can do as I've done and make a bunch of them. They look quite impressive when grouped together. When I showed this to my husband, he said, "Wow, that looks cool. The look like raviolis."

You'll have to come back later and read Ravioli Pillow: Part II, where I'll show you how I made my pillow cover. In the mean time, start cranking out those yo-yo's and let me know how it goes!
No comments:
Post a Comment